
Network Management
How to Rebuild UDT Jobs
This article walks through the steps required to rebuild UDT jobs when they get stuck.
First published date
5/4/2022 9:33 PM
Last published date
12/27/2022 6:05 PM
Overview
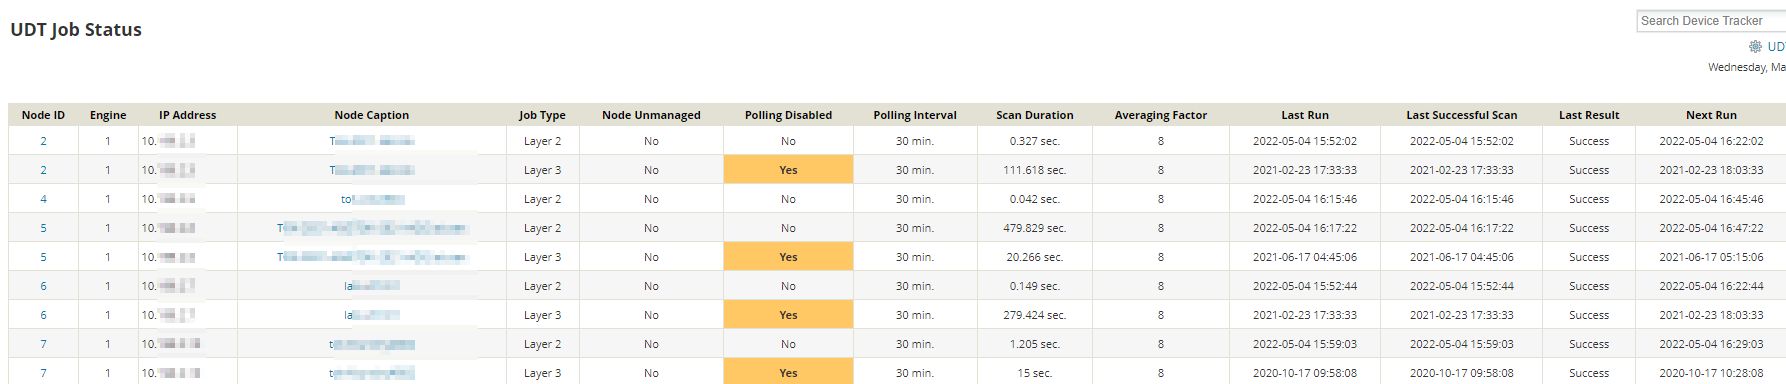
Occasionally UDT jobs may become stuck in a running state, never complete properly, or show a Last Run time of 1899-12-29 18:00:00 with a Last Successful Scan time of 1899-12-29 18:00:00. The status of these jobs can be seen on the page at Settings > All Settings > UDT Settings > View UDT Job Status:
Product section
User Device Tracker
Resolution
NOTE: After following the steps below, it can take some time (several hours to possibly a day) for all the UDT jobs to rebuild and repoll.
- Connect to the Orion server.
- Open Orion Service Manager from the Solarwinds Orion folder of the start menu.
- Stop all Orion services via Orion Service Manager.
- Launch Database Manager from Start > All Programs > SolarWinds Orion.
- Click on Add Default Server to connect to the SQL server hosting the Orion Database.
- Expand your SQL Server and identify the Orion Database in bold.
- Right-click the Orion Database and click on New Query. Paste the following:
-- Scripts are not supported under any SolarWinds support program or service.
-- Scripts are provided AS IS without warranty of any kind. SolarWinds further
-- disclaims all warranties including, without limitation, any implied warranties
-- of merchantability or of fitness for a particular purpose. The risk arising
-- out of the use or performance of the scripts and documentation stays with you.
-- In no event shall SolarWinds or anyone else involved in the creation,
-- production, or delivery of the scripts be liable for any damages whatsoever
-- (including, without limitation, damages for loss of business profits, business
-- interruption, loss of business information, or other pecuniary loss) arising
-- out of the use of or inability to use the scripts or documentation.

Truncate Table UDT_Job
- Press Execute Query.
Solarwinds Platform 2020.2.6 and lower
- Go to C:\ProgramData\Solarwinds\Installers
- Note: ProgramData is a hidden folder, please make sure that the "Show hidden files, folders, and drives" option is enabled on Folder Options.
- Right-click JOBENGINE-2.xx.x.xxxx-JobEngine.v2.msi and click Uninstall - Please note that file names may differ by version.
- Right-click COLLECTOR-2.xx.x.xxxx-CollectorInstaller.msi and click Uninstall - Please note that file names may differ by version.
- Right-click JOBENGINE-2.xx.x.xxxx-JobEngine.v2.msi and click Install - Please note that file names may differ by version.
- right click COLLECTOR-2.xx.x.xxxx-CollectorInstaller.msi and click Install - Please note that file names may differ by version.
- In Orion Service Manager, select Start Everything to start all services.
Solarwinds Platform 2022.2 and above
Collector:
1. RDP to the Orion Server.
2. Stop the SolarWinds Collector via the Orion Service Manager on all Orion servers.
3. Navigate to C:\ProgramData\Solarwinds\Collector\Data.
4. Delete the PollingController.db and PollingController.db-journal files.
5. Start the service once more via the Orion Service Manager.
6. The files will be rebuilt automatically.
2. Stop the SolarWinds Collector via the Orion Service Manager on all Orion servers.
3. Navigate to C:\ProgramData\Solarwinds\Collector\Data.
4. Delete the PollingController.db and PollingController.db-journal files.
5. Start the service once more via the Orion Service Manager.
6. The files will be rebuilt automatically.
Job Engine:
1. RDP to the Orion Server.
2. Stop the SolarWinds Job Engine via the Orion Service Manager on all Orion servers.
3. Navigate to C:\ProgramData\Solarwinds\JobEngine\Data.
4. Delete the JobEngine.db and JobEngine.db-journal files.
5. Start the service once more via the Orion Service Manager.
6. The files will be rebuilt automatically.