
Tools
Create a self-signed SSL certificate in Serv-U
This article describes how to set up a self-signed SSL certificate in Serv-U.
First published date
8/11/2019 3:45 AM
Last published date
8/11/2019 3:50 AM
Overview
Serv-U supports self-signed certificates created directly, or third-party certificates from Certificate Authorities. Creating a self-signed SSL certificate in Serv-U will also generate a CSR which you can submit to third-party certificate authorities to have it signed and published.
Product section
Serv-U Managed File Transfer & Serv-U FTP Server
Resolution
1. Navigate to the Global or Domain Details > Limits & Settings > Encryption tab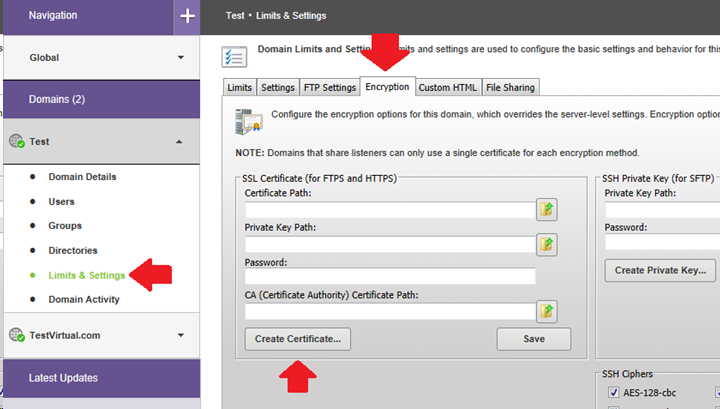
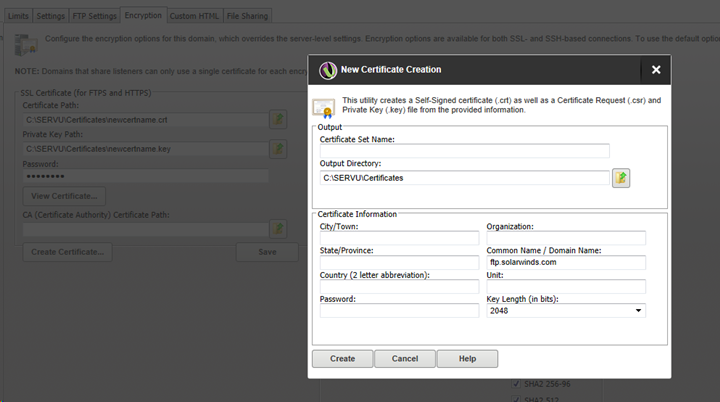
2. Click the Create Certificate button
- Output = this will be the file name of the certificate (this can be anything)
- Output Directory = where the new certificate, .key and .CSR will be saved
- Enter the appropriate information for your new certificate (CN will be the name of your website or FTP site)
- Also please make sure you remember the password you enter in this screen
- Click the Create button
3. In the next prompt, you can opt to click NO so your Serv-U application will still use your existing certificate. ** If you want to use this new certificate right away, then click YES.
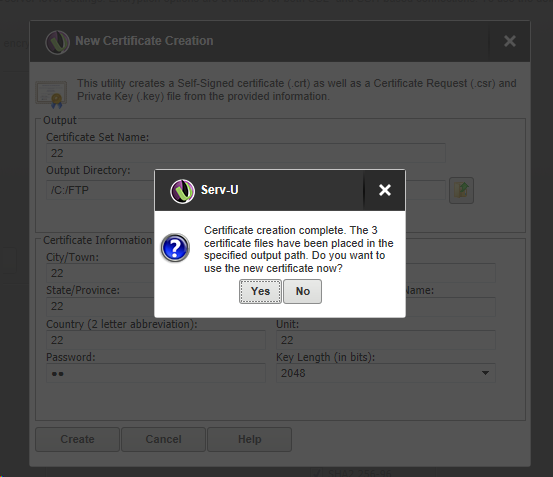
4. After saving the changes, the new SSL certificate will be in effect immediately. Browse to your HTTPS or FTPS site and it will show the new certificate details.
2. Click the Create Certificate button
- Output = this will be the file name of the certificate (this can be anything)
- Output Directory = where the new certificate, .key and .CSR will be saved
- Enter the appropriate information for your new certificate (CN will be the name of your website or FTP site)
- Also please make sure you remember the password you enter in this screen
- Click the Create button
3. In the next prompt, you can opt to click NO so your Serv-U application will still use your existing certificate. ** If you want to use this new certificate right away, then click YES.
4. After saving the changes, the new SSL certificate will be in effect immediately. Browse to your HTTPS or FTPS site and it will show the new certificate details.